Tuesday, September 9, 2014

NETMF 4.2 - Reading a TMP36 sensor

Reading TMP36 from AnalogDevices

Product page: http://www.analog.com/en/mems-sensors/digital-temperature-sensors/tmp36/products/product.html
 

Using AnalogPin 0 on a GHI Cerbuino Bee. The flashing LED indicates alternating read cycles.


Cerbuino product page: https://www.ghielectronics.com/catalog/product/351
Cerbuino schematic: http://www.ghielectronics.com/downloads/schematic/FEZ_Cerbuino_Bee_SCH.PDF

AnalogInput ain = new AnalogInput((Cpu.AnalogChannel)10);
ain.Scale = 3.3;
OutputPort LED;
LED = new OutputPort(cerb.Pin.PB2, true);
double temp, temperatureF;
bool last = false; while (true)
{
    last = !last;
    LED.Write(last);
    temp = (ain.Read() - 0.5) * 100;
    Debug.Print("TempC: " + temp);
    temperatureF = (temp * 9.0 / 5.0) + 32.0;
    Debug.Print("TempF: " + temperatureF);
    Thread.Sleep(1500);
}
It's that simple!


Tuesday, September 2, 2014

NPN calculations

In an attempt to keep these calculations organized, here's the maths for NPNs.

(From: https://www.youtube.com/watch?v=ZEDdFjvnAAo)
Suppose you had a 5v/2A source and wanted to power a 5v 1A motor via mCu board (which can only source 5v/0.5A). What would the resistor need to be on the Base of the NPN?


If you have a hRE 100 NPN transistor here's the formula:

Ic = Collector current
Ib = Base current

Solving for Ib
hFE = Ic / Ib
or
100 = 1 / Ib (substitute known values)
or
100 * Ib = 1 (move the Ib over to the left)
or
Ib = 0.01A (move the 100 to the right)

Now solving for resistor needed with Ohms Law:
V=IR
or
(5 - 0.8) = 0.01 * R (substitute known values - factoring loss via transistor)
or
4.2 = 0.01 R (simplify V)
or
420 = R (move 0.01 to the left)

Viola! You need a 420 ohm resistor connected between the base and mCu pin.

To see in action: Falstad.com Circuit Simulator (A word of caution: need Java to run)

With a 420 ohm resistor:


With a 1k ohm resistor (for comparison). Notice Ie is only 431.5mA.


Tuesday, April 29, 2014

If 3 is good then 4 is better

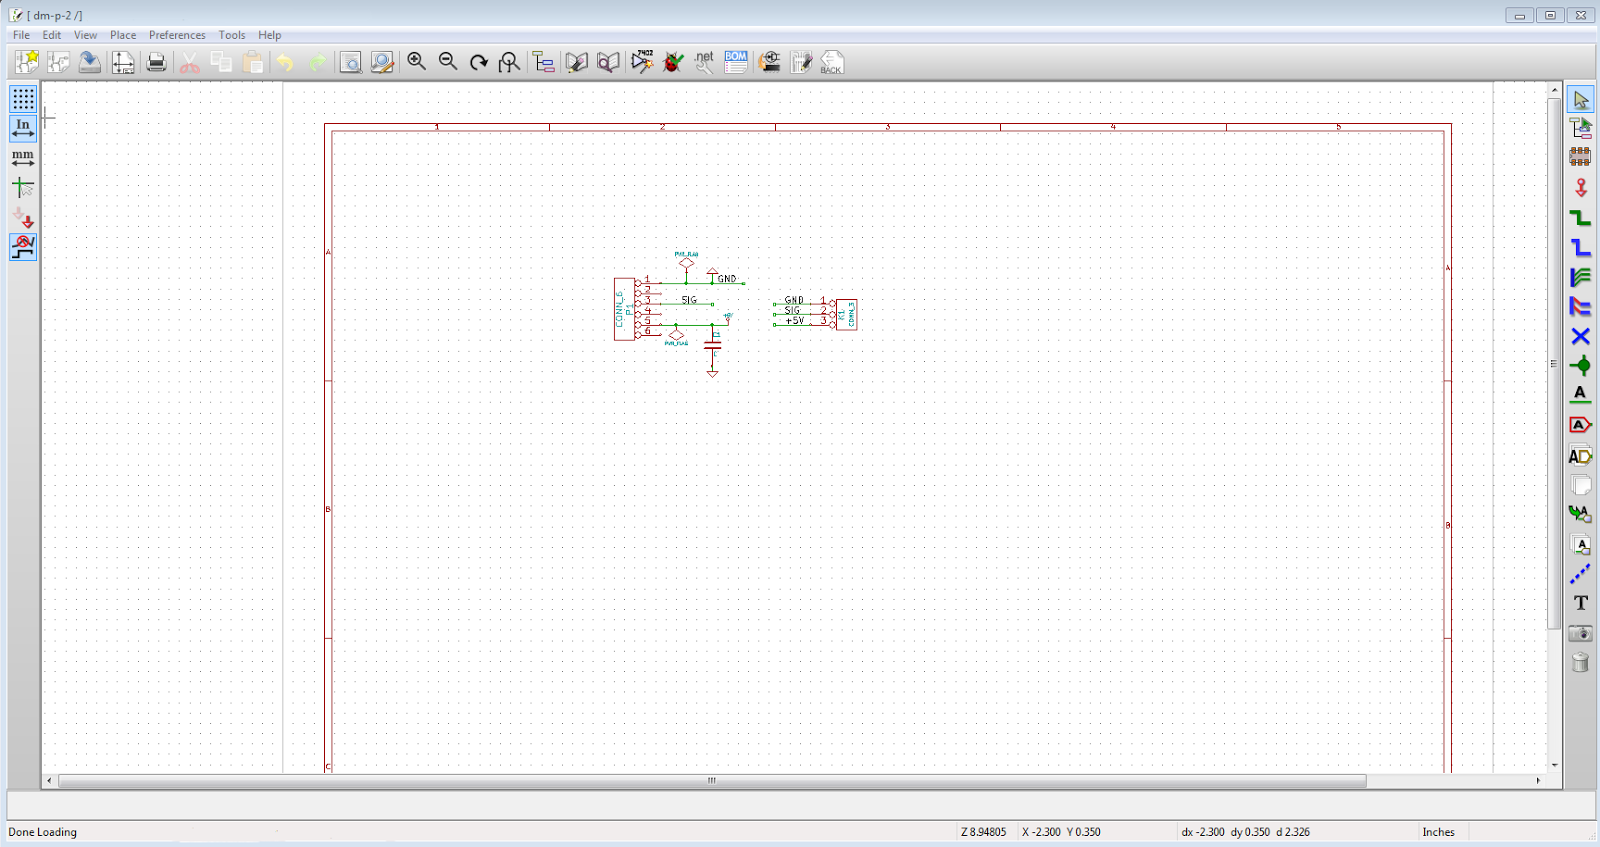
The last post about KiCad (here) was based on the DistoMatic series of boards (eventually there'll be several). I'm trying standardize my connections to simplify the process and allow for greater use.

Previously my pinouts were this:
  1. 3v3
  2. 5v
  3. GPIO
  4. Analog
  5. GIO
  6. Ground
This works fine for the Ping))), MaxBotix, SharpIR, etc. sensors, as they only need voltage, ground, and 1 or 2 signal lines.

I came up with this pinout based on the MaxBotix so that one may be able to connect the sensors so that one can trigger the next one. The trigger-out from sensor #1 would go to the trigger-in to sensor #2.

But I was think that many devices use the SPI (wiki definition) protocol and it wouldn't work with my own spec. That needs Clock, Select, DataIn, DataOut pins, 1 more than what I have available. However, if I remove one of the power lines, then I would have 4 lines for data.

So going forward I'm going to only supply 5v to the my boards. If the sensor or breakout board needs only 3v3, then I can use a voltage divider or a regulator to bring down the voltage.

New pinout:
  1. 3v3
  2. GPIO
  3. GPIO
  4. Analog
  5. GIO
  6. Ground
I am trying to learn from those who came before me --
  • Gadgeteer has a 10 pin connector protocol, with 3v3, 5v and GND being standard places
  • MikroElectronics has a connector with standardized pinouts for several protocols
  • Arduino has standardized pinouts on the connectors for the mCu breakouts.


Wednesday, April 16, 2014

Next project in queue - a mikroBUS.NET board

MikroElectronica produces a variety of hardware boards designed to ease the building of complex projects. To standardize the connections, they have come up with the mikroBus specification. Unlike the Arduino platforms, it specifies the type of function for each pin instead of simply breaking out all the pins from the MicroController.

The specification as found on the MikroElectronica site.

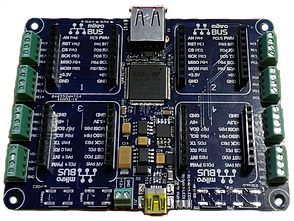
Various folks from the GHI forum and Oberon Microsystems  have undertaken building a .NET MicroFramework version of this system -  mikroBUS.NET. There are currently 2 mainboards under development: the Dalmatian with 2 mikroBUS sockets and the Quail with 4 sockets.


Dalamtian

Quail

Recently Bec a Fuel posted the progress of this endeavor in the form of a video demonstrating the brand new (and still underdevelopment) Quail board with various modules, NETMF framework and NETMF drivers running the Click boards.


To assist with the project, I'll be building a MBN (mikroBUS.NET) board and will be documenting the process for others to avoid my mistakes ;)


Friday, April 11, 2014

More KiCad learning curves - always double check!

The Good, the meh and the bad.

These boards are for the DistoMatic mainboards to inteface with Parallax Ping )))))) ultrasonic sensors.

tl;dr version:

Good news : Got my KiCad designed DistoMatic boards in the mail. 

Meh news : Throughhole pads are not on both top and bottom as they are in Eagle by default.


Bad news: Either the labels are wrong or my pins are in the wrong order in relation to the Ping )))))))).

The Meh

With Eagle, when you place a throughhole connector, it defaults to puttin the pin pads (where you apply 
solder to) to both top and bottom.  Below is the property for the 3 hole connector - notice there's no selection of which PCB layer put the pads on.


Contrast that property window with the one below, which is for the trace (the path for the current to go through on the board) which is set to be placed on the bottom layer.


Here's the corresponding property window for the "pinhead" in KiCad


Notice there's a layer selection in this window that wasn't there in Eagle. Since I was used to the style, I didn't even think to change the defaulted top layer section.

Even so I should have caught this when submitting the design to OSHPark.com. A great feature of their site is that when you upload a project, it will generate a preview of the various different layers.

Here's a previous version of the board (biggest difference being the SMT connector). You can see the gold pads on both the top (left) and bottom (right) layers.

Before ordering, and waiting 2 long weeks, I should have noticed that pads are only on the top (left) layer.

These are things that are taught by experience. Hopefully this helps others to avoid the same issue.


Monday, April 7, 2014

KiCad links (aka Hurry up and wait)

I've re-done my designs in KiCad and have been to submitted to OSHPark.com, now the waiting. Eagle is an established design software package, so many part libraries are already in place. In my initial dive into KiCad, I've had to layout some SMD pads so that's part of the waiting to ensure I got it right before going on to the next designs.

While I love the pricing and that you get only 3 boards (less wasteful than other services that have a minimum of 10), with OSHPark it takes about 2 (long!) weeks to get your boards back. So while I'm waiting here's a few helpful links.

***

First of all, here's the link to KiCAD official download page and site.

***

With Eagle, you just can submit the BRD file to OSHPark. However with KiCad, there's a list of different files you need to zip up and submit.

tymkrs (older version of KiCad) and Wayne and Layne (recent version) both have blog posts about the settings for submitting files to OSHPark.

****

To ensure that your design will work correctly with OSHPark (aka DRC), here is a link from an Electronics.StackExchange question that covers track width and other settings.

****

Here's a couple of videos and links that have helped me to learn KiCad, I would like to think, quickly:

Contextual Electronics is an online teaching company specializing on electronics. They have a 6 part tutorial series that walks you from concept to finished design for a 555 timer based blinky. Here's a link to the entire series in a single page.

Dave from EEVBlog has a first impression video where opens an existing design without any primer on the software and attempts to figure it out. It's both informative and very entertaining!

CAD Tutorials has some helpful videos as well

Thursday, March 27, 2014

KiCad ho!

(Yes I know that "ho!" in this context is an improper use of the word. It's an interjection that is used to call attention to a destination and not an object --- source)

If they were the same price, I would pay for Eagle, but they are not.  Eagle is $315/year or $830 for a lifetime license, whereas KiCad is generously offered at no charge under GNU GPL v2 free of charge licensing.

KiCad - available at www.kicad-pcb.org
Eagle - free for hobbyists is available at www.cadsoftusa.com

That difference is reflected in the layout and integration of the two different products.

Eagle:


  • The layout of the various Eagle windows is what one would expect from a professional pre-ribbon styled Windows application. 
  • It's interface is mouse focused, which I prefer as I occasionally work on layouts on my tablet.
  • The integration between windows in a project is great - update the schematics and the layout will reflect that change

KiCad


  • KiCad's icons and palette selection looks less "professional" 
  • The interface comes alive when used with keyboard shortcuts, but is labourious when only using a mouse -- nearly useless on my tablet. 
  • There's no automatic integration the schematics and layout - you need to export the Net list, update the footprints then import that into the PCB editor.


That said I'm starting to warm up to KiCad. To me, it's not as polished as Eagle, but once you get used to it and understand the flow, and are in front of a keyboard, you can quickly get things accomplished.

So after a week or so I give KiCad a thumbs up. Factor in the price, then it's 2 thumbs and 2 large toes up!

Wednesday, March 19, 2014

It shouldn't be this hard .... (part III)

Just when you thought it was safe to go back into VS....

(Part II here)

All I did was add some scaffolled OData controllers, added all my tables to the WebApi.Config and pressed F5.

Could not load file or assembly 'System.Web.Http, Version=5.0.0.0, Culture=neutral, PublicKeyToken=31bf3856ad364e35' or one of its dependencies. The located assembly's manifest definition does not match the assembly reference. (Exception from HRESULT: 0x80131040)


Line 35:             config.Routes.MapODataRoute("odata", "odata", builder.GetEdmModel());
Line 36: 
Line 37:         }

Really?

The build output has this:
1>  Consider app.config remapping of assembly "System.Net.Http.Formatting, Culture=neutral, PublicKeyToken=31bf3856ad364e35" from Version "5.0.0.0" [] to Version "5.1.0.0" [D:\Lieb-Tech\packages\Microsoft.AspNet.WebApi.Client.5.1.1\lib\net45\System.Net.Http.Formatting.dll] to solve conflict and get rid of warning.

1>  Consider app.config remapping of assembly "System.Web.Http, Culture=neutral, PublicKeyToken=31bf3856ad364e35" from Version "5.0.0.0" [] to Version "5.1.0.0" [D:\Lieb-Tech\packages\Microsoft.AspNet.WebApi.Core.5.1.1\lib\net45\System.Web.Http.dll] to solve conflict and get rid of warning.

1) There's no app.config, as this is a web project.
2) Why not provide some link to a help document to explain this issue?

.NET is like a box of chocolates. Can't wait until I get the next dependancy/version/etc error.


It shouldn't be this hard .... (part II)

Couldn't stay away from this for too long.

(Part I here)

I deleted the folder and started over.

1) Started VS as administrator
2) Created Web API Project without a test project
3) Compiled right away and it worked!
4) Updated all packages via NuGet
5) Compiled and it still worked!
6) Added my EDMX model again (had to do the Azure path all over again)
7) Compiled and it still works!
8) Chcked in the code into TFS

9) On a different computer I cheked out the code.
10) Compiled and it didn ... no it worked!
11) I hit F5 and .... NOOOOOOOOOOOOOOOO!!!!!!!!!

Could not load file or assembly 'Newtonsoft.Json, Version=4.5.0.0, Culture=neutral, PublicKeyToken=30ad4fe6b2a6aeed' or one of its dependencies. The located assembly's manifest definition does not match the assembly reference. (Exception from HRESULT: 0x80131040)


12) This time the web.config fix worked

      <dependentAssembly>
        <assemblyIdentity name="Newtonsoft.Json" publicKeyToken="30ad4fe6b2a6aeed" culture="neutral" />
        <bindingRedirect oldVersion="0.0.0.0-6.0.0.0" newVersion="6.0.0.0" />
      </dependentAssembly>

Again ... I thought that .NET was supposed to fix all this! As there are more and more versions, it seems to be worse than ever before. It's such a fragile system.

Alot of good things are coming out of Microsoft lately -- so far Azure ROCKS!!!! So hopefully all this will be worked out as well. Part of the issue is the lack of transparancy -- who knows where these references are coming from.


It shouldn't be this hard .... (part I)

So I'm ready to start playing with OData and WebAPI to be a backend for my services.

Story version -- it shouldn't be this hard. .NET was supposed to fix the version issues with DLLs - seems like it swapped one set of headaches for another.

Long version:

1) Created new ASP.NET Web Application project in Visual Studio 2013
2) Selected MVC & Web API + test project with no authentication
3) Added to TFS (as it's an internal project; drivers and other code with be on Git)
4) Updated all NuGet Packages (I installed VS about 1 hour before starting this trek) - there were 2 pages listed
5) Imported my Azure Subscriptions
5) Right clicked on Models and selected Add -> ADO.NET Entity Data Model
6) Had to go to my Azure management page to get my DB info, even though I did the import on step 5
7) Entered my Azure SQL DB info.
8) Screen showed that EntityFramework 6 couldn't be selected as my project referenced an older version. No option to install now via NuGet -- only to continue with an older version or cancel and start over. So I cancelled out of the dialog.

NuGet manager is showing that EntityFramework is available for installation. Even though EF5 is installed, NuGet is not showing that.

9) Installed EF6 via NuGet.
10) Start the DB model over again (glad that it remembered my Azure settings)
11) Now there's no longer a selection screen for EF version, just right to selecting my objects - selected all and kept the default options.
12) Compiled the project for the first time and I get this error:

Assembly 'xxxx, Version=1.0.0.0, Culture=neutral, PublicKeyToken=null' uses 'System.Web.Http, Version=5.1.0.0, Culture=neutral, PublicKeyToken=31bf3856ad364e35' which has a higher version than referenced assembly 'System.Web.Http, Version=5.0.0.0, Culture=neutral, PublicKeyToken=31bf3856ad364e35'

Mind you I didn't nothing in NuGet or anywhere else to select a version for System.Web.Http

13) Went to Add Reference to see if I can find a 5.1 version of System.Web.Http, and there's only 4.0.0.0 listed under extensions.
14) Found there's a version of Microsoft.AspNet.WebApi.WebHost that's version 5.1.1
15) Going back to Package Manager, it shows that I've got that installed already ... hmmm.
16) So I add this to the Web.Config:

<dependentAssembly>
<assemblyIdentity name="System.Web.Http" publicKeyToken="31bf3856ad364e35" />
<bindingRedirect oldVersion="5.0.0.0-5.1.1.0" newVersion="5.1.1.0" />
</dependentAssembly>

17) Compile again and same failure. So at this point I've added nothing that wasn't Microsoft generated and it can't compile. All I've added is EF6 via NuGet and built my ADO.NET model.

I'm sure you can sense the increasing frustration ....

18) I tried to PM>  install-package microsoft.aspnet.webapi.webhost -version 5.1.1.0 - and of course it says that it's already installed.
19) Let's re-install all packages: PM> Update-Package -Reinstall

Still won't compile. Really?!?!?

20) The Reference to System.Web.Http is to version 5.1.0.0

21) Back to Web.Config and added the assembly:
  <system.web>
<compilation debug="true" targetFramework="4.5" >
<assemblies>
<add assembly="System.Web.Http, Version=5.0.0.0, Culture=neutral, PublicKeyToken=31bf3856ad364e35"/>
</assemblies>
</compilation>
    <httpRuntime targetFramework="4.5" />
  </system.web>

Guess what ... still won't compile.

Going to walk away from this, as I'm getting nowhere.


Busy times

From the top of my mind, this is what I've got going on ...

1) Waiting on new modules to come back from OSHPark.com
2) Waiting on order from Mouser.com to test new connectors (see previous post)
3) Learning KiCad to replace Eagle (set previous post)
4) Configure BizSpark items
5) Learn about the cool stuff in hosting websites and SQL in Azure - never used it.
6) Continue working on SQL schemas for multiple projects
7) Select between on Web.API / OData
8) Continue laying out hardware designs that are in process
9) Research parts for new designs (as there always seems to be 10 chips to do what you want)
10) Curse Microsoft for the Framework Hell (which has replaced DLL Hell of days of yore)
11) Layout client interfaces for store & project management site
12) Waiting on parts from Mouser.com for new project
13) Continue working on software drivers for modules in process

This list is painting in very broad strokes, and many of the items can be broken out to many sub-items.

But it's fun! The whole raison d'etre for Lieb-Tech is for me to learn things and hopefully help others out with what I've learned.

So I say keep it coming!!


Tuesday, March 18, 2014

A little toasty

I've got so much to learn about this whole process, so I dove right in! 


Duke Nukem from the GHI forums wanted a Gadgeteer Module to connect multiple MaxBotix ultrasonic distance sensors to a mainboard. After some research and designing I came up with my DistoMatic line. I'll discuss these boards a little later on when I have more to show off.

I found connectors which I liked and that were surface mount, and bought some. Putting the cables together was an adventure for another post. In all my research, I neglected to check if they were compatible with non-leaded solder temperature profiles. 

They were not. 

You can see the discoloration when compared to the raw sockets on the left. Also the right most connector is slightly melted - the walls should be perpendicular.


So more research and testing is needed. Lesson learned is that I have much still to learn! But this all part of the learning process I expected. 

Here's a quick overview of my current process.

1 - Prep

I've only used OSHPark.com for my boards thus far so I can't compare, but I've been rather pleased with the results. They provide 3 boards at $5 sq inch, so quite reasonable for prototyping. The ordering process is very easy, all you do is upload your .brd file, they show a preview of the different layers, and then can order it.

Fresh board from OSHPark.com

2 - Apply solder paste.

I submitted my design to OSHStensils.com and in a few days the post man brought me a 3mm stencil to apply the paste. In each order, they also include a plastic business sized card to spread it. The board is being held in place by their Acrylic Stencil Jig ($6) - figured it was the same thickness of the PCB, so it would be useful.


With paste applied

3 - Place the components

The capacitors were placed with a angled tweezers and the sockets were placed by hand. If some of the paste gets smudged by moving the parts, it's ok, within reason. The board has a layer that prevents the solder from sticking to the purple areas, so it adheres only to the exposed pads.

Notice the paste is still gray and all the pads are fully covered 

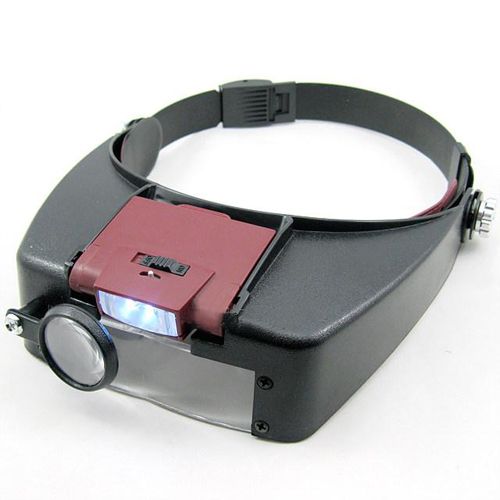
Because the 0603 components are beyond tiny, I got a visor magnifier from ebay for about $8.


4 - Bake 'em

My first attempt for these boards was on #6 (as that worked well on my previous attempts). But the sockets came out brown and slightly misshaped.


Attempt 2 was on profile #3, hoping that the short time at max temp would be ok. Not so much...


Friday, March 14, 2014

Go with what you know - at first

To start off Lieb-Tech modules will be focused on Microsoft Gadgeteer & .NETMF. Why?


  1. Comfort - been a MS .NET developer since version 1.0 days.
  2. Ecosystem 
    1. Visual Studio is a great IDE on it's own. 
    2. Setting breakpoints and getting real-time insight into values without debug.print() makes me happy.
  3. GHI - they've been great supporters for these platforms.
  4. Platforms - I love the Gadgeteer way of quickly building devices and want to (hopefully) help others to do the same.

They may not be the sexy or current platforms, but all together these make for a great system to work with.

But I do plan on expanding to supporting more.

  1. Arduino - very flexible and I view it as a distant cousin to .NET MF/Gadgeteer
    1. Not done much professionally with C/C++, so that will be a part of the learning curve
  2. RaspPi - can't beat the price for what you get - great processing power and connectivity 
    1. Not thrilled with having to deal with Linux and Python/Ruby/etc.
    2. Not thrilled with having to with hardware through an OS layer
  3. BeagleBone (see RaspPi)


These present challenges for me, but also opportunities to learn and broaden the scope of my abilities. I always felt that being at least familiar with similar technologies helps to be better at what you are working on at the moment.

Thursday, March 13, 2014

Just go ahead and do it ...

You'd think I'd learn by now... When embarking on a new project I seem to go through these stages of emotions. At the beginning it seems insurmountable or something beyond me. But I push forward anyways.

Anything is possible!

Google/Bing, blogs/forums/Youtube and pestering people are typically how I get my info. Once all this information is taken in, I try to apply it to an endeavor or project. I'm not one to rush into them, so when I start I have a decent grasp of the concepts and how they apply (doesn't mean that I know what I am doing).

Putting all this together makes me feel that I can really accomplish what I am setting out to do.

Nervous/Self-doubt

Now when I start to undergo the process, it hits me that "I'm still learning" and "What I am about to do is likely completely wrong". I think that "the money I just spent has been wasted", "it will take forever to get new boards/parts to correct it" and that "it likely won't work after all this" and "all that I will accomplish is a big fat failure".

Frustration

I push past that and start to work on the project. Unless it works perfectly the first time (which it hardly ever does), it feels as the negative feelings from above are being validated.

Determination

Little internal peep talks like "I can do this!" or "I'm getting better and can do things that I couldn't before" start to mind.

Euphoria 

When (if) it works then I'm back to "anything is possible", "the world is my oyster" and "I'm the King of the World!" emotions, but 1,000 times more intense.


It's really a feeling of empowerment when you push past these largely self-imposed barriers and do what you set out to do. You can build upon them and move to the next accomplishment, just to repeat these 5 steps all over again.

But the point - is to do it anyways and when you hit those walls along the way, keep pushing through it.


Wednesday, March 12, 2014

Change of gears (already)

Over the past several months, I've been learning the program Eagle from CADSoft (big thanks to Justin from the GHI forums). It's a software package that allows you to layout schematics and boards for PCB manufacture. They have a free version for hobbyists that has some limitations that I've been using. A benefit to using Eagle, is that the output is directly usable for OSHPark.com (a great place to get prototype boards made).

However (there always seems to be a gotcha) the hobbyist version is for non-commercial use only. So to make this jump to offering my boards I would need a commercial license. To get the version which would legally allow me to have more than 2 layers for 1 user is $820!!!!! (CADSoft USA pricing page) Say what?!?!

I contacted them to see if they have any discounted versions for start-ups. The best they could do was to offer a 1 year license for $315. But then I would need to renew it every year or upgrade to the $820 lifetime license.

Open Source to the rescue!!


KiCAD (found here) seems to be a solution. Quoting directly from their page:

"KiCad is an EDA software suite for the creation of professional schematics and printed circuit boards up to 16 layers. KiCad runs on Windows, Linux and Apple OS X and is released under the open-source GNU GPL v2 free of charge."

Hopefully the learning curve won't be too step. It appears you need to be careful with drill files (the definition of where holes are put in your boards) with OSHPark.com, but they are working on improving the experience.

So it's off to learn KiCAD to see if I can save $300+. Another benefit is that by providing KiCAD projects instead of, or in addition to, Eagle, it will be easier for other new ones to benefit from my designs.

Tuesday, March 11, 2014

Let the fun begin...


About 4 years ago I built the FEZDA obstacle avoidance robot. This basic bot was a fun introduction (as developers call it a "Hello World" project) to the embedded electronics world. It was based on the GHI FEZ Domino board with Arduino headers and running the Microsoft .NET MicroFramework.

It was very satisfying to watch it navigate it's way around completely autonomously. The project was based on various boards offered by GHI and my hacking together the mechanical components together. So while I selected the modules, it was very limited to the modules that I could purchase pre-made. This was because the thought of making my own modules seemed like an insurmountable challenge.


Over the past many years since, I've absorbed much information from the helpful fellows on the GHI Electronics forum. I've asked many questions and hopefully as well have helped some along. To give back, I submitted several projects (including the FEZDA C# code, a couple utilities to help debugging and a simple WiFi utility).

But the GHI community has armed me with enough knowledge to start offering my own modules.

My background is software development, no Electronic Engineering at all, so don't expect clever designs. In fact one of the names that I wanted to go with, but was already taken, was Curious Designs, as I figured people would look at my boards and think "That was a curious decision to do it that way".

It's an empowering feeling that many things are now possible for me in this realm. I just need to: come up with the idea, layout it, have the boards made and install the components - and BAM! (to borrow Emerald's phrase) - there's my creation! Obviously it's not that simple, but the thought that it's possible feels good!
Another big source of learning for me has been the OSHW offerings by GHI (such as the Cerberus mainboard) and and SparkFun. Both companies support the maker community by providing Schematics and Eagle documents to glean information from. So I want to follow this model and offer many of my modules in similar fashion.

It's a bit concerning that by doing this, I will lose revenue as people can reproduce my designs. But hopefully people will find them useful enough to cover my production costs if they don't want to produce them themselves.

Over the next few months I will be working on the FEZDA II project. As a part of this I'll be producing modules to make it come to life. Hopefully others will find them useful to build their own bot or as a helpful part in their project.

A theme I trying to develop here is to give back to the "maker" community. This will be apart of what I will be trying to do with this venture. For some this includes community teaching and involvement, for others it's forming make camps and still others it's a serious issue they are politically active in. But these are not what I'm very good at or have a disposition for.

So here are some ways I intend to do this:
  • Provide many, if not all, of my in-house (Lieb-Tech.com) modules as OSHW, including Eagle files, BOMs and datasheets
  • Provide the software drivers for the modules under the Apache 2.0 license
  • Use GitHub to distribute them so as to provide the full access to the source code
  • Use this Blog to provide information about designing and making modules for others
  • In the future I will provide services that will hopefully make it easier for other makers to offer their modules
  • In future I will provide software that hopefully will make it easier for other makers to organize the process 

Not sure where this is going to take me, but hopefully it will be an enjoyable ride!